
Review of Combat Wombat Miniatures 15mm Near Future Armor Models
John Kelley
As a modeler I have always enjoyed historical modeling. Everything from the Mk. 1 tanks crossing the Somme battlefield in 1916 to the M1A2 Abrams tank roaming the desert. But I also enjoy science fiction, and lately, Sci-fi or Near Future ground vehicles. About a year ago I was looking for something out of the ordinary to build so I began looking at Sci-Fi or Near Future Armor war game models which are quick and easy to build. I considered the Warhammer 40K series but the size of the models meant that several vehicles would take up a lot of room. My continuing search led me to several Sci-fi model war game sites and vendors and eventually to Combat Wombat Miniatures. Scott Wadyko is the owner and creator of this line of miniatures and they can be purchased as individual pieces to create your own unique model or as a complete kit. The prices are very reasonable and delivery is quick using the U.S. Postal Service. You are not charged until the order is ready to ship.
Kits
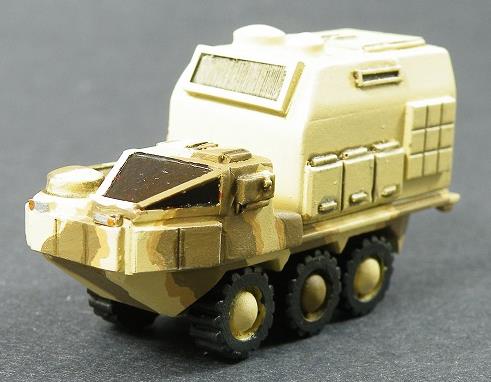
This 15 mm line of miniatures is designed for the war game table and as such are simple and rugged in design with very few pieces. For example the 8 X 8 Armored Gun System or AGS consist of the turret, an upper and lower hull and 8 wheels. All of the parts are resin castings made from one piece molds and will require assembly. The product line is large and has wheeled, tracked, anti gravity tanks and armored vehicles. Other items include Tim's Terrain ground work and building details, a Star Fortress for Stars Wars games, Wombat's Discount Space Ships, and a line of turned gun barrels to replace the kit barrels if the modeler so desires. The models are well cast with good detail but some preparation work will be needed to ensure the parts assemble without any gaps. No instructions are included but the models are simple so none are needed but the finished models can be found on the web site for reference.
Building tips
One of the first things I do before I begin assembly is to sand the mating surfaces with wet or dry sand paper used wet until they are flat. Sometimes the center of the part has receded too much to completely flatten it without losing important detail so I only sand enough to create a good gluing surface. Care needs to be taken to ensure that the mating faces are level. To do this I sand in a figure eight motion on a flat surface, turning the part front to back to make certain they are level. I make about two or three passes and check to see how much material I have removed. Wet sanding removes material faster then dry sanding so check your work often. For gluing the model parts together and adding details 5 Minute Epoxy and Cyanoacrylate glue, or super glue, can be used. For any gaps I use Tamiya Putty Basic Type or Epoxy Putty. Resin parts produce a fine dust when sanding which is why I wet sand but even when you lightly dry sand wearing a mask is a good idea to prevent breathing in the dust. Since the wheels have no location holes I made up a jig from Evergreen Strip Styrene so that when I attach the wheels to the model they will be level.
Kits
This 15 mm line of miniatures is designed for the war game table and as such are simple and rugged in design with very few pieces. For example the 8 X 8 Armored Gun System or AGS consist of the turret, an upper and lower hull and 8 wheels. All of the parts are resin castings made from one piece molds and will require assembly. The product line is large and has wheeled, tracked, anti gravity tanks and armored vehicles. Other items include Tim's Terrain ground work and building details, a Star Fortress for Stars Wars games, Wombat's Discount Space Ships, and a line of turned gun barrels to replace the kit barrels if the modeler so desires. The models are well cast with good detail but some preparation work will be needed to ensure the parts assemble without any gaps. No instructions are included but the models are simple so none are needed but the finished models can be found on the web site for reference.
Building tips
One of the first things I do before I begin assembly is to sand the mating surfaces with wet or dry sand paper used wet until they are flat. Sometimes the center of the part has receded too much to completely flatten it without losing important detail so I only sand enough to create a good gluing surface. Care needs to be taken to ensure that the mating faces are level. To do this I sand in a figure eight motion on a flat surface, turning the part front to back to make certain they are level. I make about two or three passes and check to see how much material I have removed. Wet sanding removes material faster then dry sanding so check your work often. For gluing the model parts together and adding details 5 Minute Epoxy and Cyanoacrylate glue, or super glue, can be used. For any gaps I use Tamiya Putty Basic Type or Epoxy Putty. Resin parts produce a fine dust when sanding which is why I wet sand but even when you lightly dry sand wearing a mask is a good idea to prevent breathing in the dust. Since the wheels have no location holes I made up a jig from Evergreen Strip Styrene so that when I attach the wheels to the model they will be level.
Painting and finishing
I prime the assembled parts with Tamiya Surface Primer Light Grey Item #87042 to give the acrylic paints I use a surface to grip to. This is an important step as some paints will not stick directly to bare resin. While any good primer will work I have had the best results with the Tamiya brand. For base coats and camouflage I use Vallejo Model Colors, Tamiya and Model Master Acrylic paints when finishing the models.
I prime the assembled parts with Tamiya Surface Primer Light Grey Item #87042 to give the acrylic paints I use a surface to grip to. This is an important step as some paints will not stick directly to bare resin. While any good primer will work I have had the best results with the Tamiya brand. For base coats and camouflage I use Vallejo Model Colors, Tamiya and Model Master Acrylic paints when finishing the models.
Detailing
I like to add extra detail to the models such as head lights made from square strip styrene and tail lights from styrene and rod. I make hatches using plastic sheet for the cover, rod for the hinge and channel stock to hold the hinge. Lifting hooks come from model railroad accessories sets which can be purchased from your local hobby shop or online retailers. Smoke mortars are made from rod for the mortars and strip styrene for the mounts. While these models are intended for war gamers they can be detailed and put into a diorama.
I like to add extra detail to the models such as head lights made from square strip styrene and tail lights from styrene and rod. I make hatches using plastic sheet for the cover, rod for the hinge and channel stock to hold the hinge. Lifting hooks come from model railroad accessories sets which can be purchased from your local hobby shop or online retailers. Smoke mortars are made from rod for the mortars and strip styrene for the mounts. While these models are intended for war gamers they can be detailed and put into a diorama.


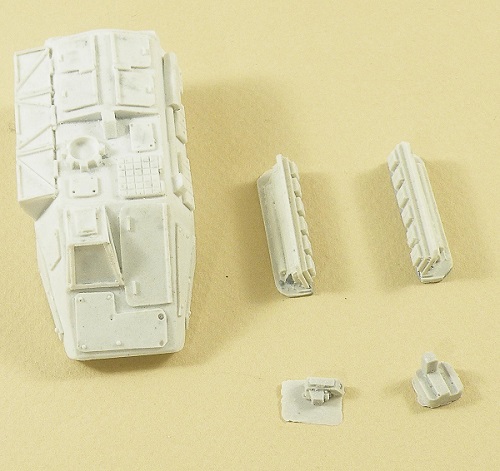
This is the unassembled Atlas Cargo Truck.
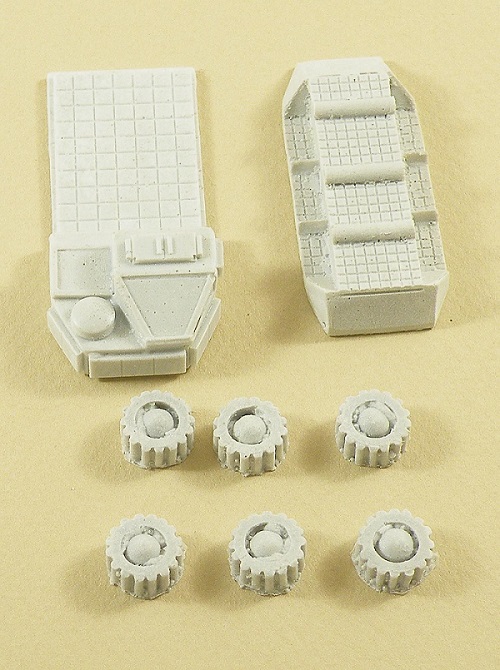
This is an unassembled Grizzly A.P.C
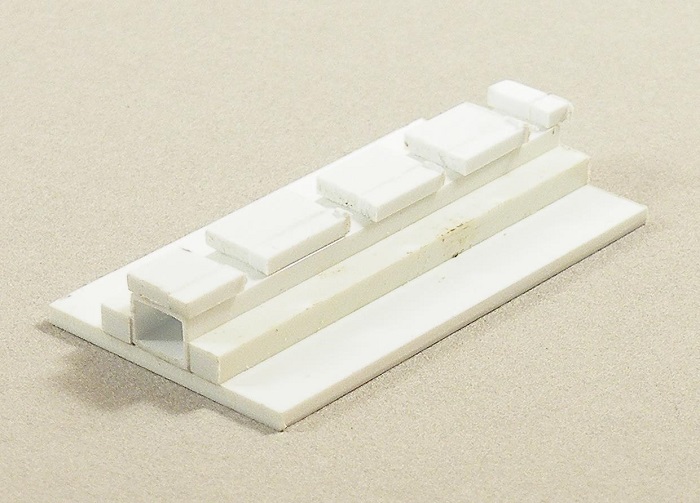
For figures and accessories I use Ground Zero Games products which are recommended by Scott. I use the Vehicle Crew Sets SL-01 which fit the vehicles very well. These figures are cast in white metal and clean up quite easily while the detail is very good. I also use their stowage sets, Stores Pallets x 6 (2 each of 3 types) # V15-ACC19 and Fuels drums (type B) x 12 # V15-ACC18. In the photo I have been primed them with the Tamiya Primer and then finish coated them in Vallejo Model Colors U.S. Olive Drab, English Uniform, Russian Uniform, Olive drab, for the boxes, and Dark Sand for the straps. The fuel drum was painted with Citadel Paints Ultramarine Blue and washed with Guilliman Blue Glaze. The rest of the stowage was washed in Agrax Earthshade.


While these kits are marketed for the war gamer I enjoy building and detailing them as a change of pace to the more serious side of historical modeling. If you are interested in building something quick and easy or just want a little diversion I highly recommend The Combat Wombat Miniatures line of models. All of the models in this review were purchased by me.
Resources
Combat Wombat Miniatures
http://combatwombatminiatures.com/
Ground Zero Games
http://shop.groundzerogames.co.uk/
Combat Wombat Miniatures
http://combatwombatminiatures.com/
Ground Zero Games
http://shop.groundzerogames.co.uk/
